

This project started with a chunk of wood that was—let’s be honest—kind of boring. It wasn’t even an entire slab, just a leftover piece from another project. But when wood is underwhelming, you overcompensate. And that’s exactly what I did.

Cleaning Up the Slab
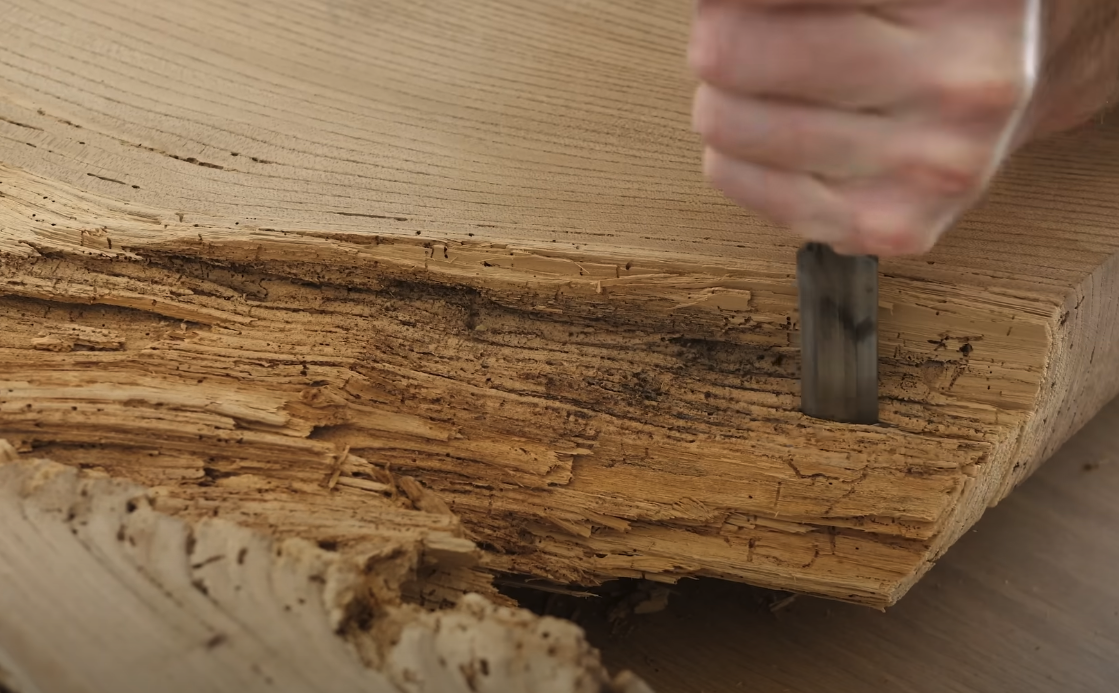
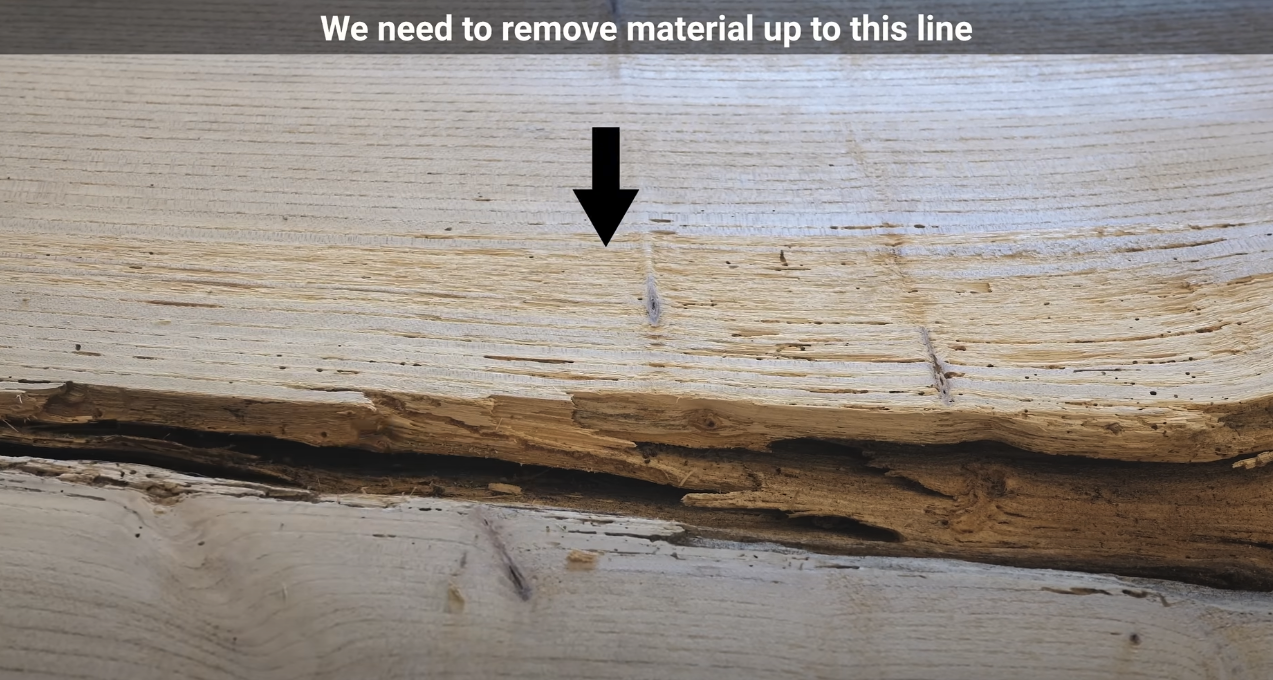
Before doing anything—boring or interesting—I had to deal with some rotten wood. Functionally, the slab was totally usable; it just didn’t look great. My solution was to remove all of the bad wood from the surface and about half an inch down, ensuring none of it would be visible in the final piece. This also meant I wouldn’t need as much epoxy to fill the gaps.
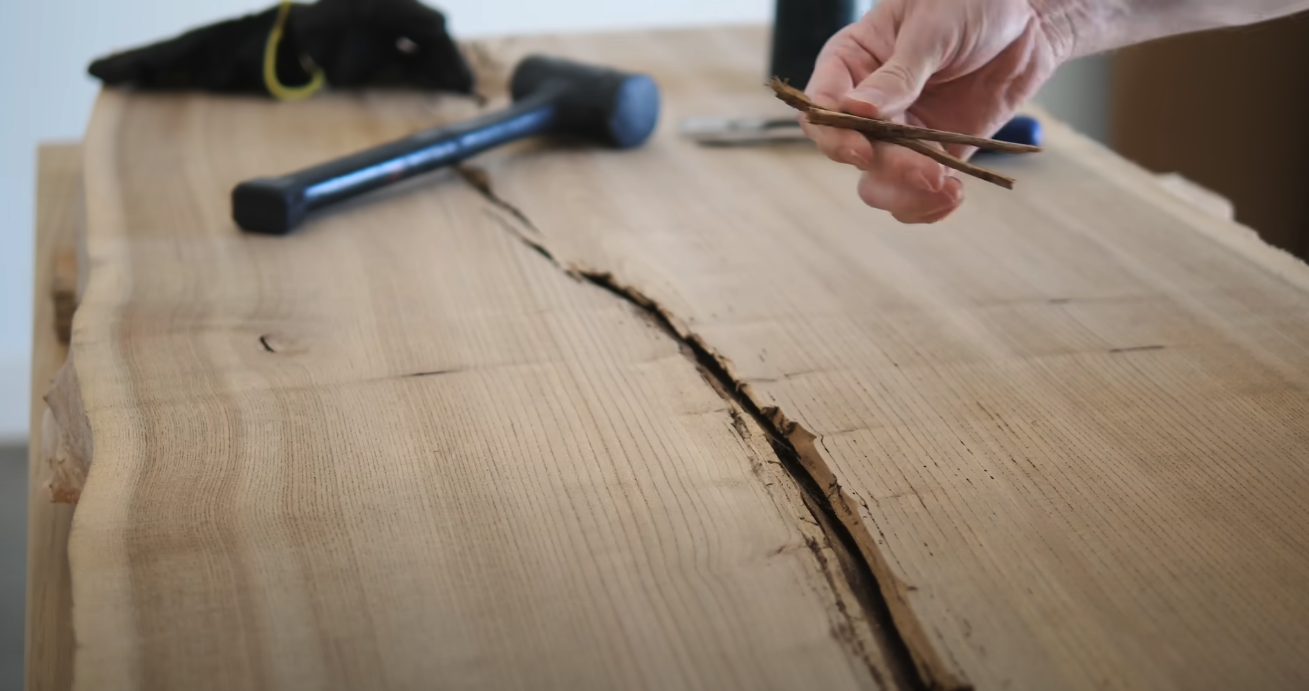
One thing that I wasn’t thrilled about was how removing the wood left an unnatural-looking break. I had two options: leave it as it was or feather it into a more natural bottleneck shape. I decided to leave it, but I had to wait for the finished piece to know if it was the right choice.
I hadn’t mentioned it yet, but this slab was going to become a desk, and it would be for sale, but I didn’t know if the person who bought it would place it against a wall or in the middle of a room, where all sides would be visible. Because of that, I had to decide: should I cut straight edges or leave them natural?
Deciding the Edges: Natural or Straight?
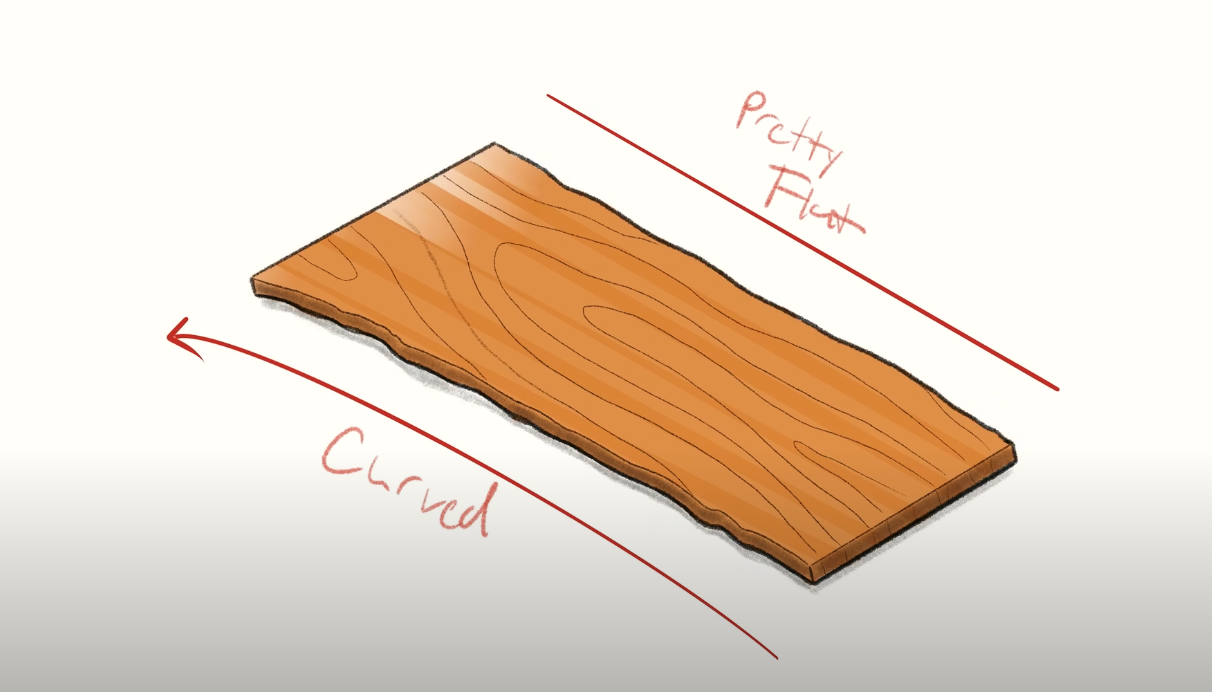
Thankfully, the piece was already pretty rectangular. One edge had a long, subtle curve, where I imagined someone would sit. The other edge was close to straight. Either option would have worked, but if the desk ended up in the center of a room, the natural edge would definitely look cooler. If it went against a wall, the natural edge was still flat enough that it wouldn’t look too strange.
I followed the natural shape of the edges, removing knots and softer wood just below the bark—also known as phloem. And yes, we had to look that up. Up until 30 seconds earlier, we thought "phloem" was some kind of slime Nickelodeon made in the ‘90s.
Preparing for the Epoxy Pour
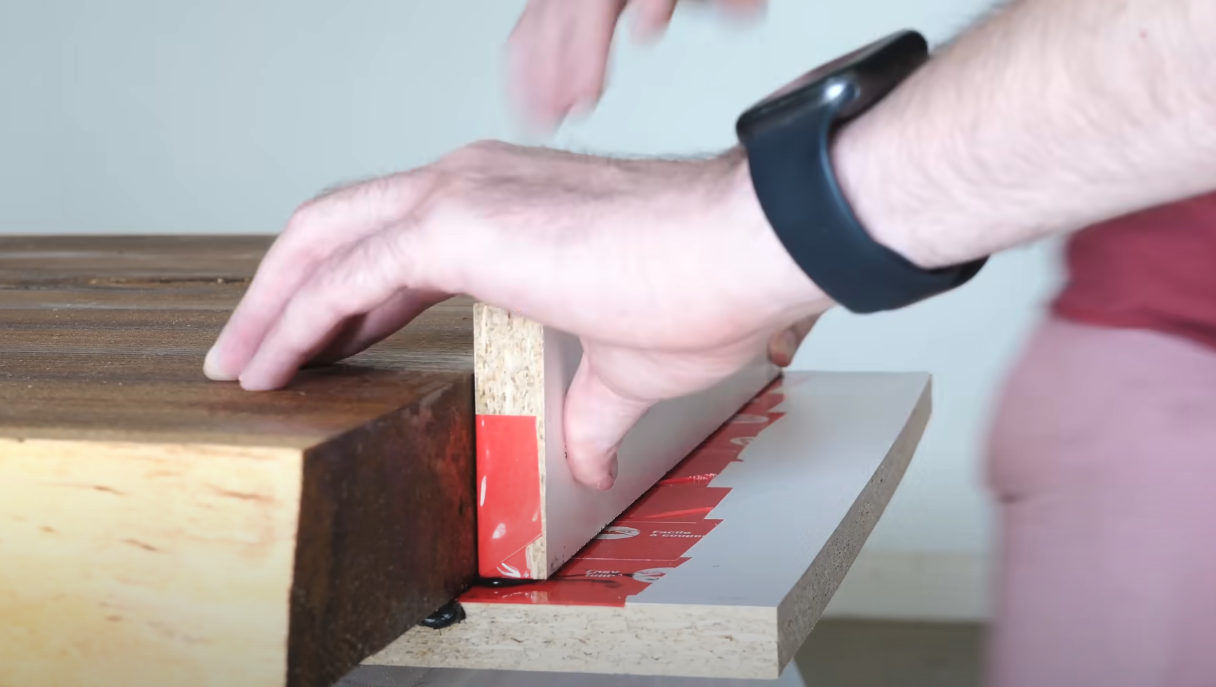
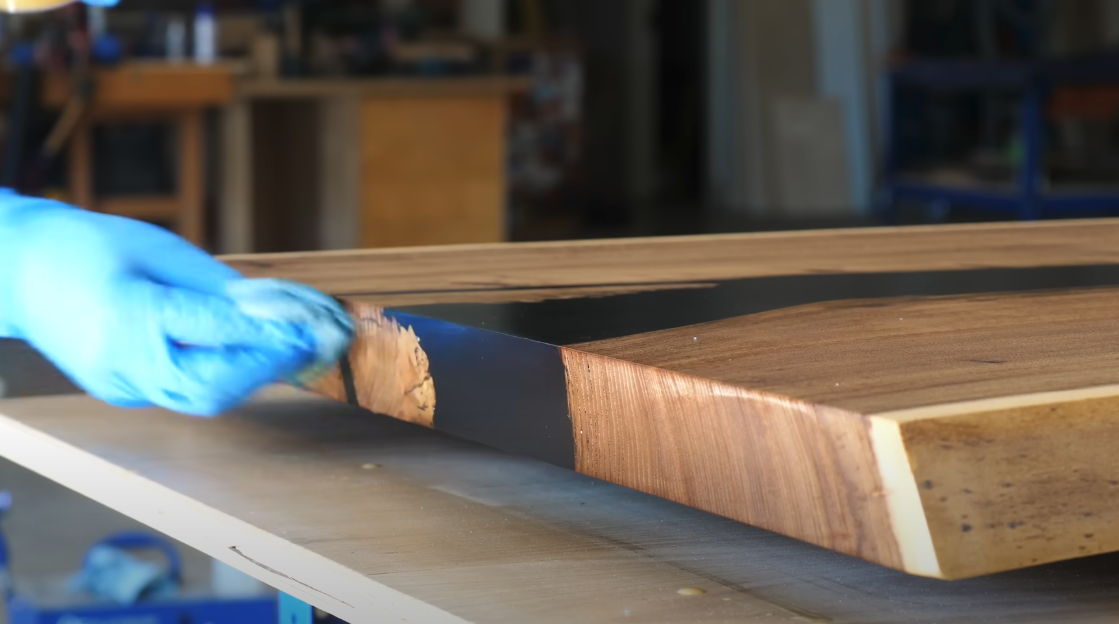
If you’ve ever thought about skipping this step and just using tape—don’t. Epoxy is expensive. It will seep through through the tape wasting material, costing you a lot of money, and making a mess. I had to learn this the hard way.
Since I hadn’t cut straight edges, I couldn’t build a traditional form for pouring epoxy. Instead, I made a partial form by attaching melamine to the slab. You can also [watch the video] where I break down every detail of the process.

Epoxy Pour
After a ton of recommendations from you guys, I checked out Blacktail Studio’s epoxy course. I’ll say this—if you plan on doing epoxy work, it’s 100% worth it. I did the math, and the price of the course was equal to about 1.08 gallons of the epoxy we used. So, basically, if it saved me from making one bad mistake, it had already paid for itself.
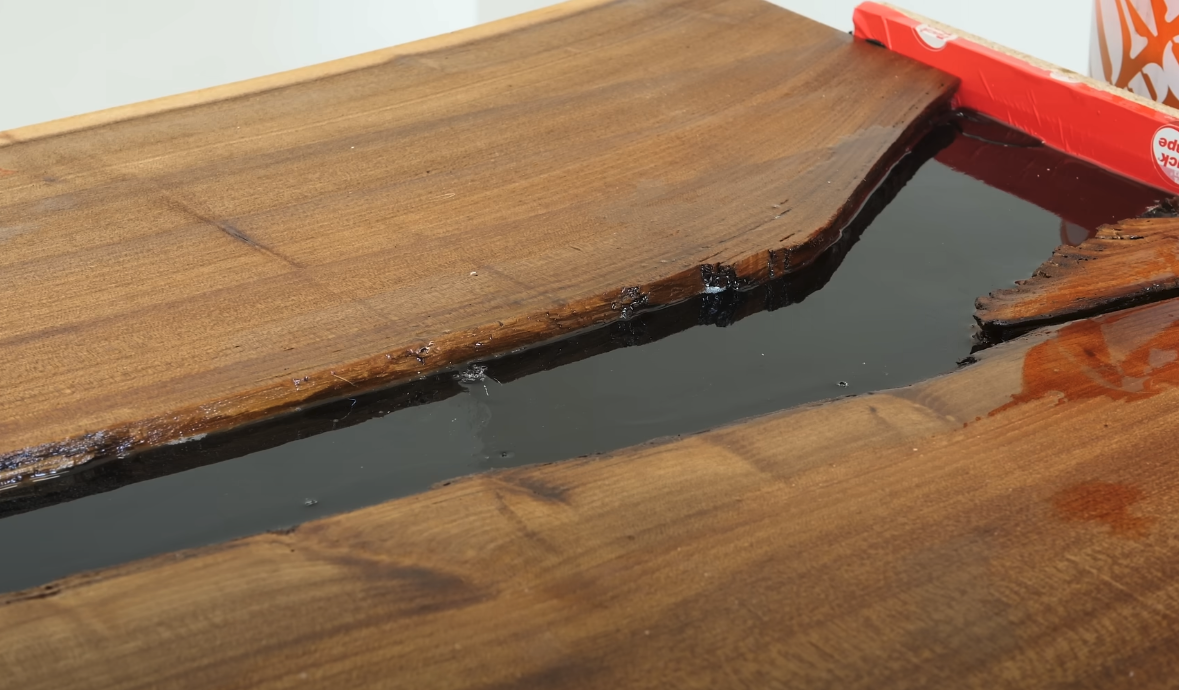
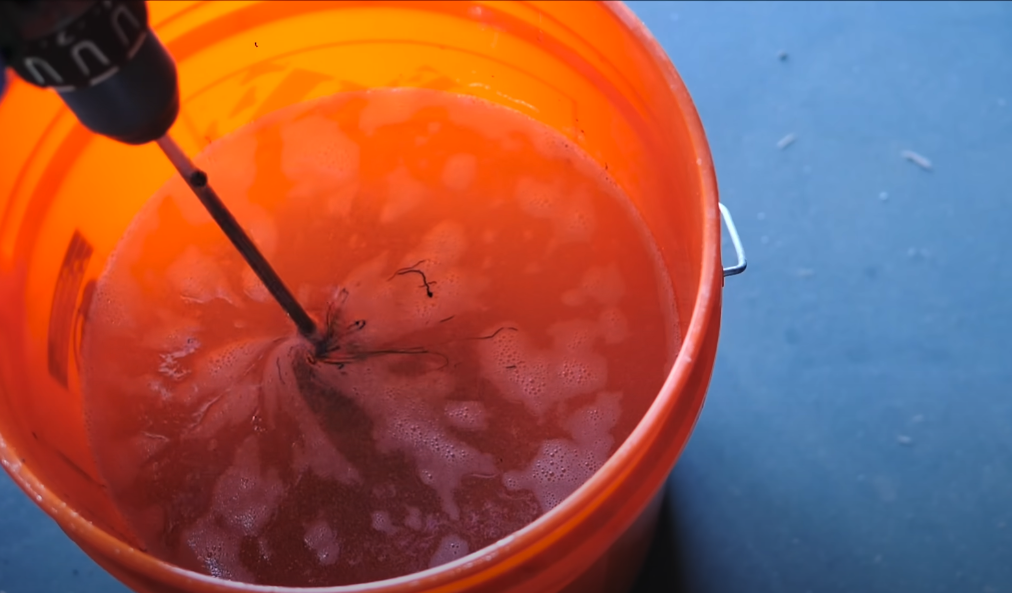
At this point, my epoxy had been curing for about 48 hours, and I could see that it was still about half an inch below the top of the slab. I used Fathom Thick Set from TotalBoat, which could be poured up to two inches thick. Since my slab was just barely over two inches, I probably could have done it all in one pour. But realistically, you almost always end up doing a second small touch-up pour anyway, so it didn’t really matter.
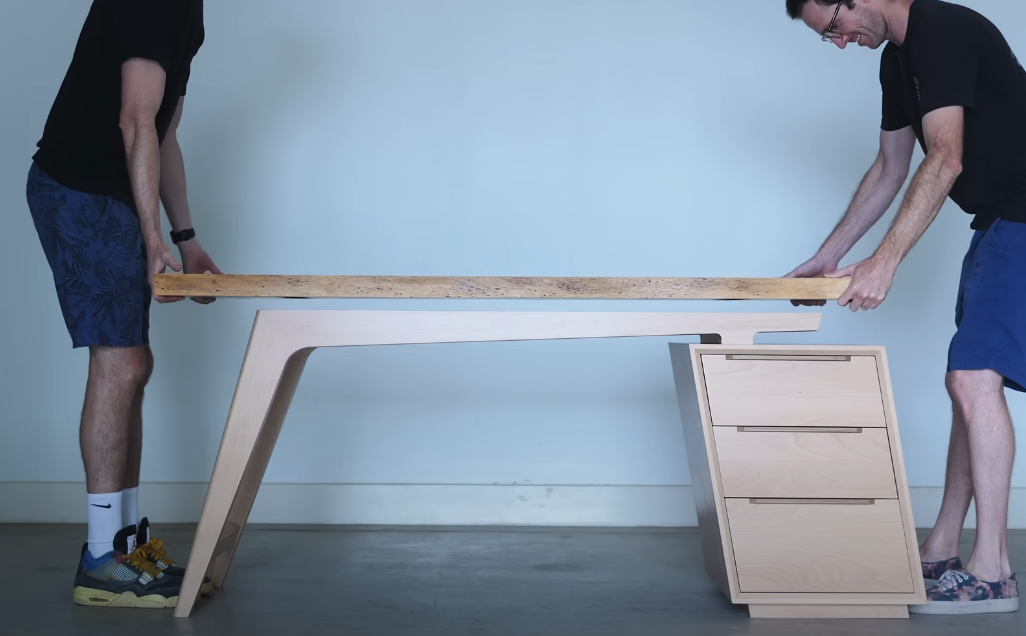
Building a Ridiculous Base
Usually, I design bases to be subtle, letting the slab be the star of the show. Not this time. Since the slab itself was simpler, I decided to go big with the base. I ran a poll on different designs, combined a few ideas, and even had one person suggest using the slab as firewood. Which I think was meant as an insult, but honestly, I respect the boldness.
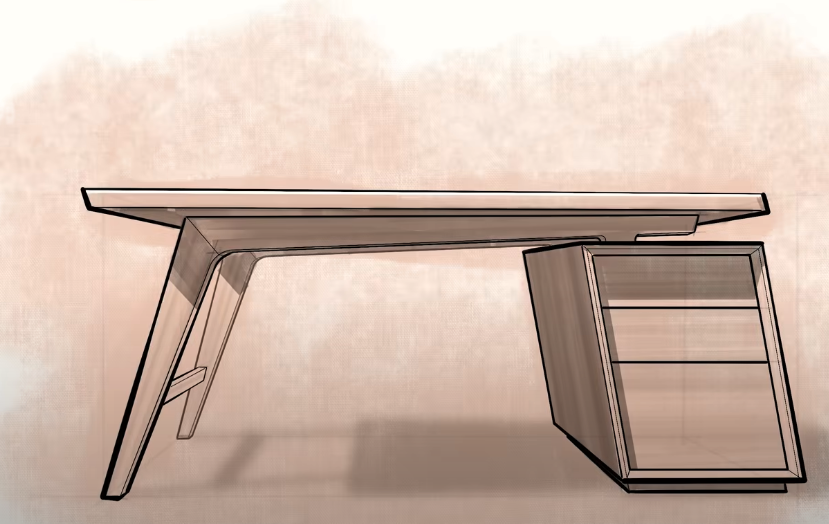
The concept of a leaning cabinet was where things really took off. I kept refining it and eventually paired it with the design that people had voted for. Once I saw those together, it just felt like the way to go.

Once the template was ready, no matter how complex the shape, the workflow stayed the same. That’s why with all of my plans that use templates, I provide several options to make them as easy as possible. And if someone didn’t want to cut them themselves, I even offered pre-cut templates for purchase.

The legs I was building for this desk looked really cool but might have seemed intimidating at first glance. However, they weren’t nearly as difficult to make as they appeared. The hardest part of making these kinds of shapes was just creating the templates.

Getting back on topic, at this point, I had traced out the template shapes onto the workpieces and cut them out, leaving everything slightly oversized on the bandsaw. From there, I used a table saw to cut the two mating joint faces. Then, I glued everything together and let it dry overnight.
Assembly and Finishing
For assembly, I used threaded inserts and bolts instead of screws. Two reasons: First, screws wear down over time, while bolts stay solid. Second, it just feels more premium. It’s the difference between assembling furniture with an Allen wrench versus a screwdriver. One feels upscale, the other feels like Ikea.

For finishing, I used water-based polyurethane on the base to keep the beechwood light, and hardwax oil on the top to make that grain pop. Because yes, I am one of those people who loves seeing the grain pop.


The Final Reveal
Earlier I mentioned that I was overcompensating for the more subtle slab by going bold with the base. In most of my slab projects, I tried to keep the base simple so the slab was the star. This time, I went all-in on the design.
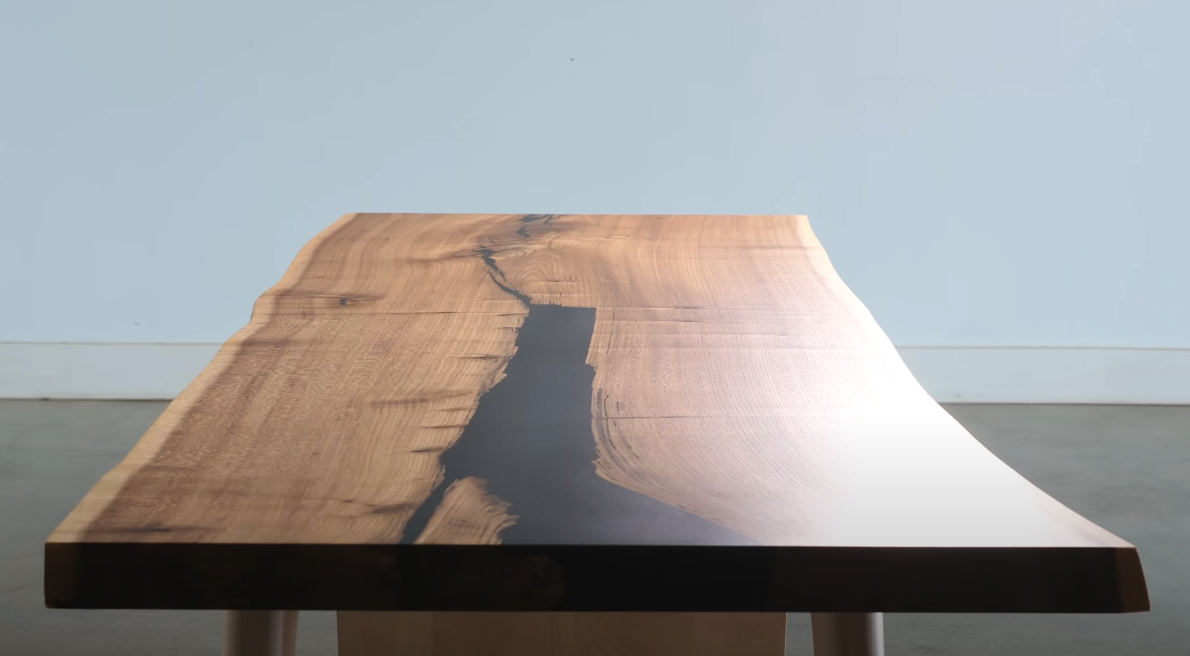

So now the question is: Was it the right choice?
What do you think?